Toxy´s Levorg

ToxyRocker

Member
Joined
May 28, 2018
Messages
32
Location
Sweden
I thought i should make a thread about my car , so here it goes.

My Levorg is a 2016 Ice Silver GT-S built in 2015.


The car started its life as a leased car. The previous owner didn't really take care of the car so there is quite alot of scratches and stuff.
The biggest damages when i got the car was: curbrach on 2 of the wheels, excessive wear on the driver's seat, underside of front bumper all scratched up like crazy and random scratches all over inside and out.

Inside door handle i changed. lots of dents and scratches.

Driver's seat. Lots of water. I have no idé how they did this in less then 3 years.

Big dent in the front spoiler


All and all its not that bad.
Here is a photo from the listing:

This is the day i picked it up. I traded in my Volvo S40 for it.


First thing i did was to order a few details:
We can't have free marketing for the dealer so i orded a new locking strip for the licence plate.


I also ordered a yellow bulb for the fog lights.


It ended up looking much better:


I decided that the headunit was crap and i wanted to change it.
After a bit of googling i found this site seicane.com.
I got a headunit witch looked good and had good reviuws at the time.
It is a good unit but has its flaws.
The processor is slower than a snail but works good enough, the touchscreen could be better and the hands free has so much static noise that it is unusable.
Other then that i think it's better than the original headunit for what i use it for.
Here is a before and after pic:


The backup cam needed a special solution. I could make a detailed guide to make the cam work if anyone want.


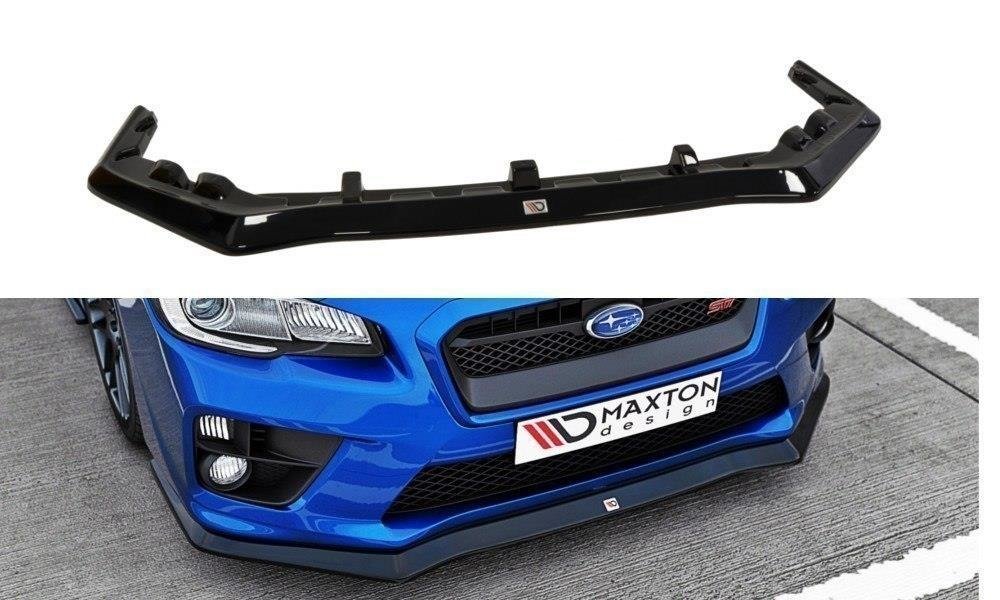
Winter was coming closer so i needed some mud flaps.
The original aero ones was way expensive and didn't provide much protection. They are about 220 usd excluding paint.
Since the impreza wrx sti is almost the same i orderd a Rally Armor kit that has much more protection and costs less.


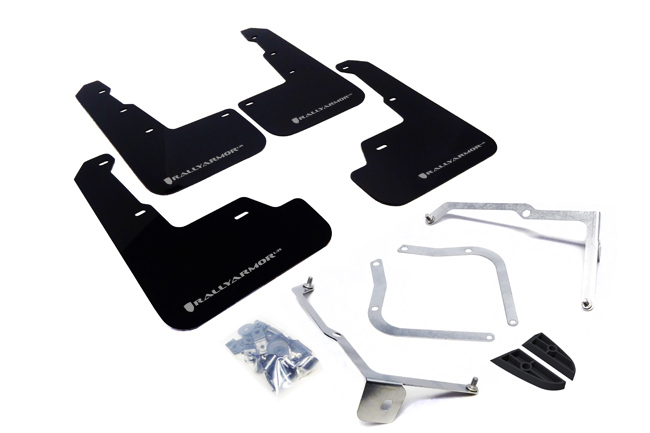
The front ones fitts bolt on. But the back ones need a little modification to fit.
It ended up looking petty good.


The shifter.
I have no idé what the previous owner did but everything is scratched.
This it the best pic i have on it but the scratches is clearly visible.

The simplest way to fix this is vinyl wrap. So thats what i did


The transformation is amazing!
It looks so much better.

More to come
 
Last edited:

nicodache

Active Member
Joined
Jun 23, 2014
Messages
523
Location
50.45459,3.95254
The wear on the driver seat could just be trouser rear pocket buttons. Some jeans have metallic buttons sticking out, sometimes with sharp edges. I got the exact same scratches on my seat, because of that exact reason.

That doesn't forgive the previous owner for the other scratches though ;)
 

ToxyRocker

Member
Joined
May 28, 2018
Messages
32
Location
Sweden
Bad news everybody!

My car got backed into and the front and back bumper got damaged.

The story:

I had been visiting my boyfriend over the weekend. I got two rock chips on the way there. One witch made a nice star break on the windshield. The other one i did not find.
On sunday night when i was going home the roads was very bad. Basically black ice roads everywhere and extremely slippery. I wasn't that worried because i have new studded winter tyres and don't drive over my ability or the roads conditions.
I was driving first in a series of cars (about 70-80 km/h on a 110 road) We approached an accident and i stopped behind a bus to wait. There were already police and fire trucks at the scene. The bus was first in line. After about 5 min some firemen came upp to us and waved at us to reverse a bit to make way for a tow truck.

This is what happened:

The bus which is first in line and about 1 meter in front of me starts reversing. I think "oh fuck" in a mini panic and putt my car in reverse and start backing up just barely avoiding the buss. As this happens i also noticed a fireman next to me waving at me and the cars behind me to reverse. My backup cam is full of dirt so i can't see anything and i almost hit the car behind me which also is about 1 meter away. They slam the horn as i almost hit them. They start reversing and i look forward and see the bus almost hitting me. I again start backing up just barely avoiding the bus. The car behind me slams the horn again and this time i think i hit the car behind me a bit, but i'm not sure. As i look forward again i see the bus just about to hit me, now im in full panic trying to avoid the bus, the car and trying to figure out what to do. The car behind me starts backing up again but doesn't make it more than a few centimeters before the bus backs into me and pushes me into the car behind who again slams the horn. As the bus hits my car i exclame "no" and just give up and let everything happen.
At this moment the fireman next to me wakes up and run forward and stops the bus.
Me and the cars behind then drive to the side of the road and park. The bus remains in the middle of the road.

After talking with the bus driver i get the impression that he didn't know he had cars behind him. He told me he was focused on an fireman in front of him waving at him to back up. He also said "I don't have a backup camera so i didn't see you"

After gathering all info and taking the pictues i needed for my ensurance the buss got a pass to continue his route. The rest of us had to wait until the accident was cleared up. It took over one and a half hour.
While we waited, there was several near accidents on the other side of the road because some drivers slowing down to look at the accidents causing them to almost being rear ended.

The accident we stopped for started as a single car spinning out and hitting the wire safety barrier. Several cars had stopped on the side of the road to help. Later a truck rammed all parked cars at full speed totaling all cars. As far as i know only one person got injured. A female passenger in one of the cars that stopped to help.


The damage on my car:

The rock chipp


Front damage


Close up


Behind


Crack in windshield


Back bumper left


Back bumper right


So to sum up the damage:
It starts with the rock chip that then developed to a crack.
Then we have the front grille that cracked, the front bumper cracked, the licence plate got smooshed, the lower grille got pushed in, the back bumper got scratched and lastly the cracked windshield.
I don't know exactly when it cracked because i didn't look closely at all the damage untill the day after. But i suspect it cracked during the accident.

Yesterday i got the message that the bus driver is at fault and i don't have to pay anything.
Im still waiting on the repair quote and my insurance company accepting it.
 

ToxyRocker

Member
Joined
May 28, 2018
Messages
32
Location
Sweden
Thanks.
My insurance covers everything so no worries.
The positive in this is that i get a new front bumper so all the scratches the previous owner did will be fixed and maybe a new windshield.
 

Ghost_HTX

Member
Joined
Nov 12, 2018
Messages
39
Inte brå... But good that someone else is to blame, huh? Im sort of hoping that someone hits the rear of my car (only slightly) so that I can get the rear end replaced (mine is an ex company car that was used to move stuff around, I think, so the rear bumper and inside of the tail gate are scratched up pretty good).
 

ToxyRocker

Member
Joined
May 28, 2018
Messages
32
Location
Sweden
On Monday im getting my car fixed.
I didn't get a new windshield (I'll fix it later this spring) but i did get a new front and back bumper cleared.
I also asked if i could keep the old bumpers but don't know yet.
I'll get a loner car for free while mine is in the shop witch is nice.

Also i found this kit for adding a pressure wash to the backup camera.
Currently its out for the XV and the standard Impreza. But i bought a kit to try adding it to my Levorg. It costs about 80 bucks. I'll let you know how it goes :)


ToxyRocker

Member
Joined
May 28, 2018
Messages
32
Location
Sweden
OK
So it's time for update.
This will be all about the backup camera cleaning kit. Basically a step by step guide.


I found it by accident in a post by Subaru Sweden on Facebook.
It is currently out for the XV and the standard Impreza. The part number is the same for both cars.
I got my kit from my local Subaru dealer. Part number: SEBLFL9000

There is an manual on how to install it but the only thing that's usable on the Levorg is how to connect the hose for the washer fluid. The rest is different. I will however add a scanned copy later for those who want it.

This is how i installed mine: (Im typing all this from memory so some steps might be slightly wrong)

To start with you need a few tools. A basic kit of socket wrenches, screwdrivers, sidecuters and a drill with drill bits size 2mm, 10mm. The smaller drill bit to start with. Lastly you need a file or a dremmel to file out some space for the spray nozzle.
I don't think i used any other tools.

1. Stripp the interior of the tailgate.
Begin with the top peice then the side pieces and lastly the big bottom peice. All peices is only fastend with clips except the big bottom one which has one screw in the handle you grab to close it with, in adition to the clips.

2. Remove the middle section of the tailgate.
To remove this one you remove about 8 screws. 2 on each edge and then 4 in the middle. After that it only held in place with a few clips. You also need to disconnect some wires but you will see witch as you go.

3. Cleaning :)

A lot of dirt will greet you behind the middle section so clean it of.
Note the cable thats coming out from the middle. I used that to block the locking mechanism on the tailgate.
Since we removed the button we can't open it if it were to close all the way. (Unless you crawl through the inside)

4. Mounting stuff

In the kit we got two pieces of hose, one long and one short. We also got two fittings, one straight and one Y shaped.
Take the short hose and attach both fittings to it. Note that the straight fitting and the long and short hoses have different diameter. The short hose should also be mounted at the bottom of the Y shaped fitting according to the manual.
Remove the old fitting on the existing hose and take the Y shaped fitting and attach as shown.
The manual shows to route the long hose on the right side, but its to short for that on the levorg so i routed mine on the left side witch fitted perfectly. Use the included clips to route the hose.


5. Drilling a hole
This part is totally different in the manual. It has a guide to cut out and use to mark exactly where to drill. This will not work on the levorg so i just picked a spot where i thought it would fit best.
To decide where to drill we need to attach the nozzle to the camera and use that as a guide.


The arrows show an edge on the nozzle that should be mounted up to the edge on the camera


Remove the cover for the sticky tape and push into place. Use the included zip tie to lock in place.
There's a hole to run the zip tie through.


Mount the camera and mark out where to drill. Start with the smaller drill bit then go to the 10 mm one.
This is where i ended up drilling. But it wouldn't hurt to do it a bit lower and more to the center.
Also do what you can to minimise metal chips on the inside.


Add some paint to the bare metal to prevent it from rusting.


When the paint has dried you can add the included gromit


Continue with point 4 and run the hose through the grommet


And attach to the nozzle. Here i used another zip tie to secure the hose won't bend and break the nozzle

6. Filing

Next step is to file away some material so the nozzle has some space.


7. Testing and final mounting
Before putting everything back together, test so it works. It helps to have an extra pair of hands for this step.
After testing and checking for leaks you can put everything back together.

8. Feel good
You did something :)

Here's a few more tests:
 
Last edited:

Nick

New Member
Joined
Feb 10, 2019
Messages
13
My gosh!!! I'm amazed at the ingenuity of that kit and install.
 

ToxyRocker

Member
Joined
May 28, 2018
Messages
32
Location
Sweden
I did it. I ordered a front lip.
Not the factory one. That one i stupidly expensive for what it is.
No i got this: (I can almost get 3 of this one for that price)


This one is obviously made by Maxton Design. It is intended for the 2015 WRX/STI but after comparing the Levorg to them i concluded that it should fit with minimal modification.
Time will tell. Here is a link to it.
It comes in 3 different textures. Gloss black, textured and carbon fiber look. The carbon fiber one didn't look that good so i ordered the gloss black one so i can wrap it with carbon fiber vinyl instead.
And if i'm really brave i can buy some carbon fiber weave and lay on top. But for that i would need to practise a bit first.
 

ToxyRocker

Member
Joined
May 28, 2018
Messages
32
Location
Sweden
About Rally Armor mud flaps. What kind of modifications is needed to do? Do you have picture of your installation?

you need to weld an extension like shown. then make two new holes. one on the extension part and the other just above the other hole.
just put the bracket in place then use a sharpie or something to mark where to drill the holes.
 

Vorg95

New Member
Joined
Dec 25, 2019
Messages
4
Hi Toxy

any chance that you could post a guide on retaining the reverse camera with the seicane headunit
 

ToxyRocker

Member
Joined
May 28, 2018
Messages
32
Location
Sweden
Hi Toxy

any chance that you could post a guide on retaining the reverse camera with the seicane headunit


The backup cam runs on 6v so so you need a voltage regulator that can make 12v into 6v. I made this one.
The connections is like this:
RCA for plugging in to the head unit "cam in". This isnt connected to the voltage regulator, it is just shrinkwraped to it. It goes straight through to the other side.
Then under the RCA connector you have 12v in and on the other side 6v out.

(ATTENTOIN! Make sure to set the regulator to 6v before you connect the backup cam.)

There is a cable you can buy that will work for this, just google "ax-sub5rvc-6v" and buy that one.
I made my own because i couldn't find anywhere that would ship it to sweden for a reasonable price.


This 5 pin connector goes to the backup cam.
Black is cam signal -
Red is cam signal +
White is Voltage +
White/grey is Voltage -

Black and Red you connect to the RCA connector. White and White/grey you connect to the voltage regulator that gives 6v


On this 28 pin connector there is a Brown/yellow wire. That one gives you 12v when you put the car in reverse. This you connect to the voltage regulator 12v in. You also need to connect a ground wire on the voltage regulator 12v in. That you can take from anywhere connected to ground. I took it from the Blue/black wire on the 10 pin connector.


And voila, you have a working backup cam.
 

Vorg95

New Member
Joined
Dec 25, 2019
Messages
4
Thank you so much really appreciate it. I’ve already purchased a pre made voltage regulator set, just no instructions on where/what to connect. Currently on holiday. I’ll be home in 3 days. I’ll replay again if I run into trouble
 
Top